Adventures In Sewing: Making My First Tote Bag!
My original intention was to make a post on this blog at least once a week, but then in a slightly embarrassing turn of events I managed to fall out of bed and sprain my right wrist. Then, of course, as soon as my wrist was better I got sick. This meant I've been out of commission for a while. I'm still sick, but I'm back and going to attempt this blogging thing some more though!
Today I'm going to bring you through my mostly successful attempt at sewing a tote bag. And by mostly successful I mean that it is a completely functional bag, is actually pretty cute and everyone who looks at it says it turned out pretty good, but when I look at it I can see all it's flaws. That's the nature of creators though isn't it? We devote hours to something, everyone else thinks it's great, but we end up going "Oh my God, look at all the mistakes though!!!"
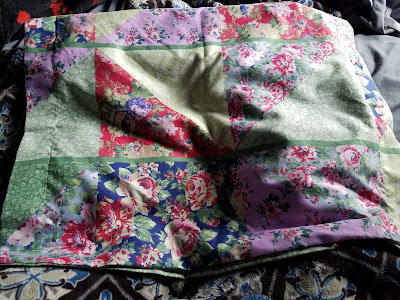
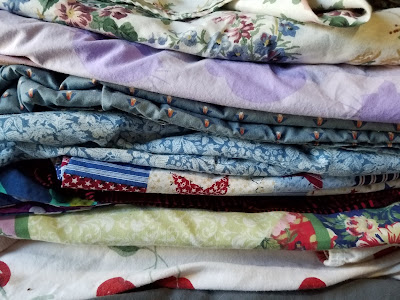
I started with this cute pillow case that I picked up 2 for 99¢ at the thrift store. I then proceeded to seam rip the crap out of it while watching about a million youtube videos. It took awhile, but in the end I had two glorious pieces of fabric that I could use for a bag.

Then I ironed. Which is where things might have run a bit amok...

So that happened... I'll admit, I can probably count the amount of times I've used an iron in my life on one hand, so it's not surprising that I messed it up. Thankfully I had plenty of fabric so it turned out okay, although I've yet to iron anything since. Partially because I'm a little terrified, but mostly because I'm dreading cleaning the iron.

The horror, oh the horror...

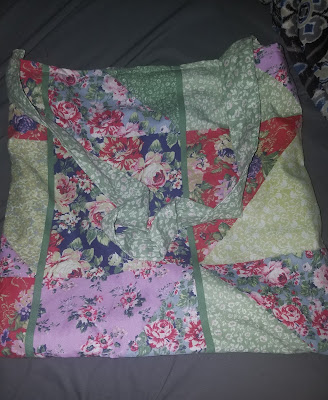
I eventually got over my embarrassment of accidentally melting my fabric and got on with the project! I took the fabric, folded in half and used my favorite tote bag to give me somewhat of a guide for size. I cut around it, making the fabric just a little bigger than I wanted the bag to be and then had two pieces to make up the outside of the bag.

I then used those pieces to cut out a green striped lining fabric which you can just barely see here, which is the point where my cat decided that clearly, she was necessary for this project. I would like to say that I nudged her off the fabric and got back to work because my cat doesn't control my life, but I can't and she does.

I maintain my position that it's impossible to resist taking a small break when faced when with an adorable cat though.

I then apparently got confused and pinned a piece of the lining to the outside. I thankfully realized that that wasn't how I was supposed to be doing things before I sewed the two pieces together and ended up having to seam rip it apart. I'm getting pretty close with my seam ripper, but I don't think I was ready for that stage in our relationship to be honest.

I went to thread my bobbin and had a moment of "what am I doing wrong here oh my god whyyyyy????" when it decided to thread underneath the bobbin. I'm still not sure what exactly I did wrong, but I spent a good ten minutes repeatedly (stubbornly) setting up the thread until finally I seemed to have done things right and it worked.

Blessed threaded bobbin! I felt very successful. I almost gave myself a round of applause.

Finally, I got to get to the sewing part! Well, after I cut out two strips of fabric that is. I measured from the top of my shoulder to about my hip where I prefer my bags to hang to and cut out two of those about twice as wide as I wanted them, using the fabric from the back of the pillow case. Then, right sides together, I used a straight stitch and sewed them into two long tubes before using the end of a makeup brush (because it's what I had right next to me) to turn the tubes right side out.
With hindsight, I wish I had first sewn both pieces of fabric together to make one very long piece of fabric before I sewed it into a tube but I thought that might make it a little ridiculous to turn the tube right side out. Ah well, you live and you learn. Instead, I ended up tucking the ends of one tube into itself and inserting the other into it before sewing across it a couple times to secure the two tubes together to make the strap.

After connecting the two tubes together I top stitched down both sides of the strap so that it looked nicer (and hopefully a little more professional.)

I ended up with a nice long strap, that to be honest, I think looks pretty decent for my first go at making one.

A closer look at the stitching. It is by no means perfect, but again, I think it's pretty decent for my first go around.

All good bags must have a pocket, right? That's my line of thinking at least, so I took some of the fabric that I had leftover from the straps and cut a roughly pocket shaped piece using my phone as a guide for the size. I then folded the top down a little bit and sewed straight across it to finish the top edge before I pinned the entire thing down to the lining, folding the fabric under about a 1/4 to a 1/2 an inch as I went.
Once it was pinned I sewed around everything but the top, and boom, you've got yourself a pocket!
It's big enough to fit my phone, a perfume rollerball and a couple of lip products which makes it a pretty dang efficient pocket in my book.

Once I had the pocket attached, I sewed the lining right sides together.

And of course I sewed all the way around the lining instead just down two sides of it and had to break out the seam ripper. I have a feeling my mantra is going to be "My seam ripper is my friend... My seam ripper is my friend... My seam ripper is my friend..." and I'll have to repeat it until I don't feel like stabbing my projects repeatedly with said seam ripper when I mess them up. That's a normal feeling, right?
I'm going with that's a normal feeling.

Here's me making a very unimpressed face at the lining before I seam ripped it.

Finally, I got to sew the outside of the bag right sides together...

And then flip it right side out and here's where it started to almost kinda sorta look like a bag. Joy! Bliss! Pride! These were all feelings I was feeling and the bag wasn't even finished yet.
As a note, I used a fairly large amount of tutorials, half of which I've forgotten by now, to figure out how to make this bag, but this youtube tutorial in specific is what helped immensely in figuring out how to make the bag and especially how to attach the straps. She explains it much better than I could ever hope to, starting at about the 14:30 mark in the video
So, onto my explanation! I started by laying out the exterior part of my bag, right sides out and then draped the strap around it, making sure I had no twists in the strap and with the strap curving around the bottom of the bag and with about two inches of the strap sticking up above the exterior. Then, I lined up one side seam with the center of the strap as much as possible, again, with the end of the strap sticking up about two inches above the top of the bag. Once I had that figured out, I sewed straight across the strap. I then repeated the process on the other side and hoped I was understanding the tutorial right.
Once the strap was attached, I took the exterior part of the bag and shoved it into the interior with the interior still wrong sides out. I matched up the side seams for both parts as well as possible and then sewed all the way around the top with the ends of the straps still sticking out about two inches.

After everything was sewn together I pulled the exterior out of the lining so that the lining was right side out again and then proceeded to sew the bottom closed. I did this by folding the bottom up, and then up one more time and then sewing a straight line straight across.
Then, I just shoved the interior back into the bag and I nearly had a finished bag! I actually could have stopped there, and had a bag that probably would have looked just fine, but I wanted to do some top stitching around the top edge, just to make it look a little neater.

And then of course my needle broke. Again, I ask the universe "whyyyy????????" Thankfully, I have a saint for a mother who helped me figure out that no, I did not need the special tool my sewing machine manual said I needed to replace the needle, I just needed a normal flat tip screw driver. After less than a half hour of me stressing that I would have to finish the bag the next day, the day - or rather night if we want to be technical, was saved.
I was able to do the top stitching around the top and my bag was finally complete! I had succeeded in sewing something bigger than a bow all by myself and boy, was I proud of myself.
I was excited to start sewing more! I had so many plans! So many dreams! And then I fell and sprained my wrist and the dreams were crushed. At least for a week or two. My wrist is more or less totally healed now though, and I'll be starting on my first attempt at a skirt in the next couple days once I'm over the cold/flu bag I've managed to catch and have enough energy to tackle cleaning the iron.
However the skirt turns out, whether it's an awful tragedy, a raging success, or somewhere in between, I plan to document it here. So expect to see the results on that in the next couple of weeks and stay tuned!
Coming up next week will hopefully be a recipe, but in the meantime leave any comments, questions, or random thoughts in the comments below! I'd love to get to know who reads this thing, since my last post got 57 views which is about, oh, 50 more than I expected.
I hope you've enjoyed this post and thanks so much for reading!
Today I'm going to bring you through my mostly successful attempt at sewing a tote bag. And by mostly successful I mean that it is a completely functional bag, is actually pretty cute and everyone who looks at it says it turned out pretty good, but when I look at it I can see all it's flaws. That's the nature of creators though isn't it? We devote hours to something, everyone else thinks it's great, but we end up going "Oh my God, look at all the mistakes though!!!"

I started with this cute pillow case that I picked up 2 for 99¢ at the thrift store. I then proceeded to seam rip the crap out of it while watching about a million youtube videos. It took awhile, but in the end I had two glorious pieces of fabric that I could use for a bag.
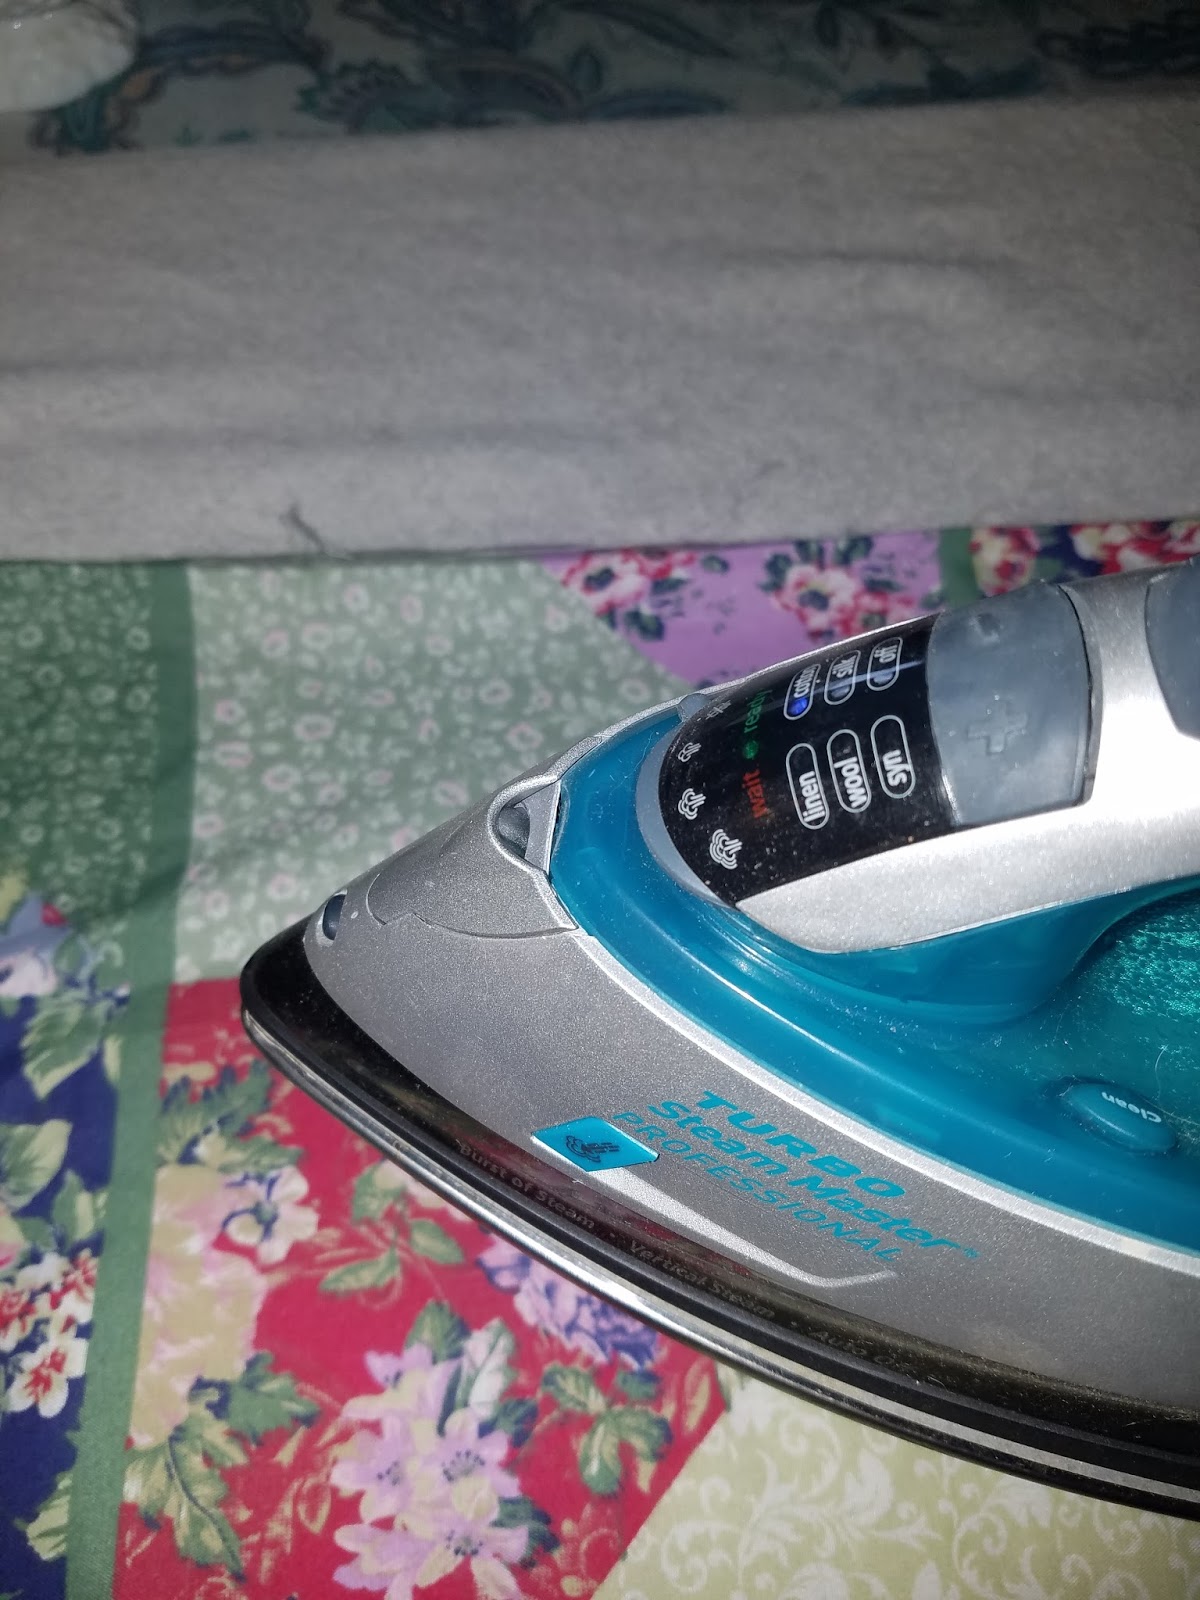
Then I ironed. Which is where things might have run a bit amok...

So that happened... I'll admit, I can probably count the amount of times I've used an iron in my life on one hand, so it's not surprising that I messed it up. Thankfully I had plenty of fabric so it turned out okay, although I've yet to iron anything since. Partially because I'm a little terrified, but mostly because I'm dreading cleaning the iron.


Blessed threaded bobbin! I felt very successful. I almost gave myself a round of applause.

Finally, I got to get to the sewing part! Well, after I cut out two strips of fabric that is. I measured from the top of my shoulder to about my hip where I prefer my bags to hang to and cut out two of those about twice as wide as I wanted them, using the fabric from the back of the pillow case. Then, right sides together, I used a straight stitch and sewed them into two long tubes before using the end of a makeup brush (because it's what I had right next to me) to turn the tubes right side out.
With hindsight, I wish I had first sewn both pieces of fabric together to make one very long piece of fabric before I sewed it into a tube but I thought that might make it a little ridiculous to turn the tube right side out. Ah well, you live and you learn. Instead, I ended up tucking the ends of one tube into itself and inserting the other into it before sewing across it a couple times to secure the two tubes together to make the strap.


I ended up with a nice long strap, that to be honest, I think looks pretty decent for my first go at making one.

A closer look at the stitching. It is by no means perfect, but again, I think it's pretty decent for my first go around.

All good bags must have a pocket, right? That's my line of thinking at least, so I took some of the fabric that I had leftover from the straps and cut a roughly pocket shaped piece using my phone as a guide for the size. I then folded the top down a little bit and sewed straight across it to finish the top edge before I pinned the entire thing down to the lining, folding the fabric under about a 1/4 to a 1/2 an inch as I went.
Once it was pinned I sewed around everything but the top, and boom, you've got yourself a pocket!
It's big enough to fit my phone, a perfume rollerball and a couple of lip products which makes it a pretty dang efficient pocket in my book.

Once I had the pocket attached, I sewed the lining right sides together.

And of course I sewed all the way around the lining instead just down two sides of it and had to break out the seam ripper. I have a feeling my mantra is going to be "My seam ripper is my friend... My seam ripper is my friend... My seam ripper is my friend..." and I'll have to repeat it until I don't feel like stabbing my projects repeatedly with said seam ripper when I mess them up. That's a normal feeling, right?
I'm going with that's a normal feeling.

Here's me making a very unimpressed face at the lining before I seam ripped it.

Finally, I got to sew the outside of the bag right sides together...

And then flip it right side out and here's where it started to almost kinda sorta look like a bag. Joy! Bliss! Pride! These were all feelings I was feeling and the bag wasn't even finished yet.
I forgot to take any pictures of how I attached the lining to the outside or how I attached the straps, but I'm going to attempt to explain.
As a note, I used a fairly large amount of tutorials, half of which I've forgotten by now, to figure out how to make this bag, but this youtube tutorial in specific is what helped immensely in figuring out how to make the bag and especially how to attach the straps. She explains it much better than I could ever hope to, starting at about the 14:30 mark in the video
So, onto my explanation! I started by laying out the exterior part of my bag, right sides out and then draped the strap around it, making sure I had no twists in the strap and with the strap curving around the bottom of the bag and with about two inches of the strap sticking up above the exterior. Then, I lined up one side seam with the center of the strap as much as possible, again, with the end of the strap sticking up about two inches above the top of the bag. Once I had that figured out, I sewed straight across the strap. I then repeated the process on the other side and hoped I was understanding the tutorial right.
Once the strap was attached, I took the exterior part of the bag and shoved it into the interior with the interior still wrong sides out. I matched up the side seams for both parts as well as possible and then sewed all the way around the top with the ends of the straps still sticking out about two inches.

After everything was sewn together I pulled the exterior out of the lining so that the lining was right side out again and then proceeded to sew the bottom closed. I did this by folding the bottom up, and then up one more time and then sewing a straight line straight across.
Then, I just shoved the interior back into the bag and I nearly had a finished bag! I actually could have stopped there, and had a bag that probably would have looked just fine, but I wanted to do some top stitching around the top edge, just to make it look a little neater.

And then of course my needle broke. Again, I ask the universe "whyyyy????????" Thankfully, I have a saint for a mother who helped me figure out that no, I did not need the special tool my sewing machine manual said I needed to replace the needle, I just needed a normal flat tip screw driver. After less than a half hour of me stressing that I would have to finish the bag the next day, the day - or rather night if we want to be technical, was saved.

I was excited to start sewing more! I had so many plans! So many dreams! And then I fell and sprained my wrist and the dreams were crushed. At least for a week or two. My wrist is more or less totally healed now though, and I'll be starting on my first attempt at a skirt in the next couple days once I'm over the cold/flu bag I've managed to catch and have enough energy to tackle cleaning the iron.
However the skirt turns out, whether it's an awful tragedy, a raging success, or somewhere in between, I plan to document it here. So expect to see the results on that in the next couple of weeks and stay tuned!
Coming up next week will hopefully be a recipe, but in the meantime leave any comments, questions, or random thoughts in the comments below! I'd love to get to know who reads this thing, since my last post got 57 views which is about, oh, 50 more than I expected.
I hope you've enjoyed this post and thanks so much for reading!

Omg, I loved all of this so much. Even as I know the story already, it was an amazing thing to read. Thank you for sharing, brightened my day. Let me know if you want a contribution later this week (like Friday?)
ReplyDeleteI'm so glad you enjoyed reading it even though you'd already heard the story as I was doing it. And I would LOOOVE a contribution, you know I love your writing <3
DeleteLizzy.... You are such a talented, beautiful, HILARIOUS, and brilliant young woman. I so enjoy reading your blogs and seeing what you have accomplished (or plan on accomplishing). I've never been able to meet you in person, but I've known your parents for almost 30 years and I must say that you remind me of the both of them so very much! Keep up with the blogging and crafting.... You are so good at it! I would like to see a blog on a dinner you have made... Whenever your mom posts one that you've made, I salivate and get hungry!!!!
ReplyDeleteOh my gosh, thank you so much!! You are so sweet, and'm so happy that you've been enjoying my posts. And I'll definitely be doing a blog on a dinner at some point soon!
Delete